IN PROGRESS......
Starting--Wednesday, July 25, 2013 and continuing until???We will "play" with found objects for printing and embellishing.
Everybody remembers potato prints.........progressing from there to everything in the refrigerator including celery ends, carrots, onions, cabbage. For some of us it planted the seeds to move us along to wood cuts (hard), linoleum block carving (a bit easier) and finally eraser carving or as it's now known, "soft block carving," using vinyl material in various sizes. Easier, more forgiving and VERY popular.
Still the humble potato was a great starter!
But this is not about carving but STARTING! Since most of us are stampers or carvers, probably card making is the first thing that comes to mind.
Sometimes the hardest part of a project is just to get going!
So we are suggesting using "found objects" for printing or embellishing to "prime the pump."
Following Yogi's (Art With Yogi) example (see her blog) Use her challenge to herself :
I've given my self, an on going self imposed challenge, to use onlythe scraps of cardstock and paper I have saved over the past many years, to create any new cards... It would take me the rest of my life to use all my scraps, but I'm going to give it my best effort (started Feb 2012)
Not Yogi's challenge but similarly....the only "rule" for participation is using only what you have on hand.
It's not even important that you USE the results this week.........only that you PLAY with them. EXPERIMENT with them. See what new things you find at your fingertips.
JOIN US!
Send us your ideas and samples, we'll add them as we go along.COME OUT AND PLAY!
Check back frequently to see what's being discovered, to see what's been added. To see if someone else's idea piques your curiosity and gives you a "starter" idea you have to try.
And remember......It won't be nearly as much fun without you!
See you this afternoon....we're off to play!
Charlotte
****************************
First "Go-To Tool" When Printing with Found Objects
Is Always A Toy Rolling Pin........with rubber bands wrapped around it.
The variety of the bands (their thicknesses), how twisted they are, how close together and how often you roll them over the material you are printing all play a part in the finished image.
A sure bet for texture, the results make great envelope liners when rolled out on tissue paper. Also creates a convincing basket weave.
****************************
7:30 PM, Wednesday, July 24
 Yesterday I was making white dots with Acrylic paint using a medium ball stylus. This was after I saw what looked like bandana cloth on another stamper's cards. She said it was just red and blue CS stamped with black ink designs and ten white dotted with a stylus. She posted a link to a demo video. It was loads of fun. I tried it with some elegant swirly stamps on red, blue and yellow CS. Just remember the paint needs more drying time than the ink does.
It really was simple and fun.
Here is the video she shared explaining the use of an embossing stylus as a "stamp." AND here are two of Fab's samples:
Arlene Faber--"FAB" shares a "Found Tool!"
 Yesterday I was making white dots with Acrylic paint using a medium ball stylus. This was after I saw what looked like bandana cloth on another stamper's cards. She said it was just red and blue CS stamped with black ink designs and ten white dotted with a stylus. She posted a link to a demo video. It was loads of fun. I tried it with some elegant swirly stamps on red, blue and yellow CS. Just remember the paint needs more drying time than the ink does.
It really was simple and fun.
>>> Another "found object"--Acrylic paint! Sometimes forget that everything stamped does not have do be done with specialized stamping inks!
Also from Fab:
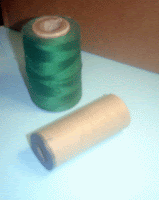
Another oldie is using the end of a cork. A shape cut from raw cardboard like the back of a yellow pad can be stuck on a thread spool and stamped with one color of ink. I would cut another for each color as there is no way to clean them.
 ****************************
 Years ago ggd purchased something called a "Funny Brush" even though we had already been making the version shown above. Can't recall the excuse now....probably something about remaking a "brush" for each use. (Unnecessary if the home made one had been saved!) Was quite surprised to find they still exist and are for sale at: Dick Blick, Jerry's Artarama and Cheap Joe's among other places.
But...since this is not a carving discussion, here is a similar version using twine and a popsicle stick. Wrapped chip board would work as well. As would twine around an acrylic block (like the rubber bands above).
Also from Fab:
Another oldie is using the end of a cork. A shape cut from raw cardboard like the back of a yellow pad can be stuck on a thread spool and stamped with one color of ink. I would cut another for each color as there is no way to clean them.
 ****************************
More With Rubber Bands
Wrap rubber bands with masking tape, electrical tape, duck tape.....whatever you have on hand. Trim one edge. Great for textures.
The uncut end produces its own texture as well.
 Years ago ggd purchased something called a "Funny Brush" even though we had already been making the version shown above. Can't recall the excuse now....probably something about remaking a "brush" for each use. (Unnecessary if the home made one had been saved!) Was quite surprised to find they still exist and are for sale at: Dick Blick, Jerry's Artarama and Cheap Joe's among other places.
****************************
Tooth Pick Holder
Tooth Pick Holder
One of the Easiest (and Most Useful) "First Carves"..........
..............is this "square" cut from the end of an art gum eraser.But...since this is not a carving discussion, here is a similar version using twine and a popsicle stick.
 Wrapped chip board would work as well. As would twine around an acrylic block (like the rubber bands above).
****************************

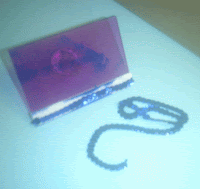
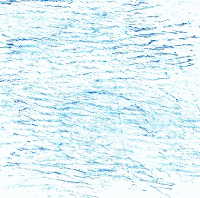
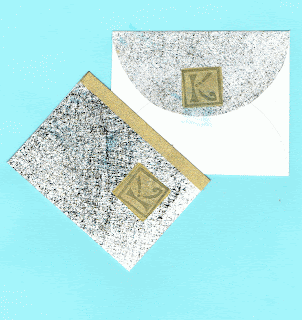
 And this texture background used a strand of sequins mounted (with double stick foam tape) on an acrylic handle. This is a temporary mounting......The handle is used often for special projects.
Once again you can see the Sparrowfoot Stamp....this time used without the border.
****************************
The envelope template is from a long ago gg designs tutorial.
Can be made with a school compass or protractor and for those of you who own electronic cutters, it's a simple matter to make your own SGV image.
For this project, ggd used a permanent glue stick to close the envelope but a simple white glue envelope glue for the top flap.
ggd's "recipe" isn't as "fancy" as these but here are several envelope glue recipes to try:
http://www.friendship-by-mail.com/envelope-glue-recipes.html
****************************
 The initial was custom made for gg designs by SparrowFoot Stamps.
Raid Your Sewing Supplies
Woven tape edging....wrapped around an acrylic block to stamp
 The initial was custom made for gg designs by SparrowFoot Stamps.
 And this texture background used a strand of sequins mounted (with double stick foam tape) on an acrylic handle. This is a temporary mounting......The handle is used often for special projects.
 Once again you can see the Sparrowfoot Stamp....this time used without the border.
Check Your Medicine Cabinet........

 Tops of pill bottles sometimes have interesting embossed designs and of course q-tips have an infinite number of uses in crafts and stamping.
****************************

 Tops of pill bottles sometimes have interesting embossed designs and of course q-tips have an infinite number of uses in crafts and stamping.
Pat Hanbery (Critter Portraits) Shares One of Her Favorite "Finds"
****************************
 Washers
String
Shelf Lining
Cross Hatch made from tines of a plastic fork.

****************************
Great Minds.....and all that!

Not exactly a "found object" but an "easy do," Cate Prado (Cloth, Paper, Scissors) talks about "upcycling" junk mail. Her emphasis is on making stencils out of school and office supplies. In the same article and of particular interest to ggd, a detailed description (from Julie Fei-Fan Balzer) of how to make stencils from magazines. Julie's emphasis is on fashion figures but ggd can see this as very useful for all kinds of other designs and shapes. Check it out here: http://tinyurl.com/Cate-s-Article
****************************
Thursday, August 8, 2013
Still "Putzing" with Found Printing......
But got diverted......by a recurring problem that you may have as well.
ggd LOVES to stockpile supplies! Subscribes to "cheaper by the dozen" and loves the security of LOTS of supplies "at the ready."
However (and we've experienced this before but just like to forget about it) having lots of supplies and having lots of supplies and having lots of USABLE supplies may (often) be different things. So, a word of caution....not all supplies stockpile with the same success. Some inks dry out, some separate. Glue sticks shrivel and get "tough" and rubbery. Cans not closed adequately yield solid, unusable contents. Rubber cement turns solid. (But save the "chunks" for rubber cement pick-ups.) The list of supplies whose shelf life is suspect is long and disappointing when you are attempting to use a stash item.
Years
ago, the granddaughters would regularly have a "test and toss"
session.....to get rid of felt tips that were too dry to be fun. (Tossing meant scoring a "basket"--a waste basket--hit from a few feet away!) The
same idea would be useful for other supplies as well.
And......checking labels as well as talking with vendors when purchasing supplies might avoid the problem all together.
>>You can probably tell from this, why more found object printing samples have not made it to these pages in the last couple of days. : )
****************************
Thursday, August 8, 2013
Not Only Were We Diverted.....
by checking the state of some really OLD supplies, we indulged in a Pinterest Browse that got out of hand!
Every "Found Object" craft idea you could ever think of was listed somewhere as someone's great new idea. We all really know "there is nothing new under the sun" but somehow it doesn't seem like it when if "feels" like you thought of it all by yourself whatever "it" is. : )
We found Fab's cardboard printing shapes and corks as designs AND handles listed and ggd's fork print texture.......
ggd even found a pattern we "thought" we had originated some forty years ago!!! Not only do we feel redundant, we feel VERY OLD!
In any case, if you have a smattering of self control--enough not to feel you have to read every set of directions "pinned"--we would recommend checking out Pinterest.
Eventually the browsing settles down to a more reasonable pace (different timing for different folks!) and you can begin to think of it as another useful tool in your crafter's arsenal. You can file away ideas for future use and be able to find them quite easily. It's a bit like Google in pictures! Good illustrations and for the most part, good information. Did see the "hint" for sharpening scissors by cutting foil listed there. I've tried it numerous times without success so not every "pin" is a winner!
Not all new. You
will find some of your own good old standbys. And you may be reminded
to bring back some of your own long forgotten "tricks" for current use.
For now.....out of Pinterest, off the computer and back to playing with "found objects."
****************************
Friday, August 9, 2013
Fun Foam of course.....is the ever present crafts supply....almost as common as crayolas and construction paper were "back in the day."
 It's good for cushioning under your material when stamping. Very handy to protect your more elaborate cards when mailing and can be easily cut to make simple elements. It holds the ink nicely so stamps very clearly. In a pinch it will make a useful stamp pad as well.
In this case, the stamp silhouette was created with a punch and mounted on an ink bottle that was handy. (Another found item? Not for stamping but for use as a temporary stamp mount.)
****************************
Plastic Produce
Bags
for texture
Simple Masking
What DID we do before Post-it notes?
****************************
This will be all for a while........time to wash some of the ink off many of the test items and surfaces in order to use them for their original purposes.
Will return soon.
Charlotte
ggd
 Washers
String
Shelf Lining
Cross Hatch made from tines of a plastic fork.
****************************
Great Minds.....and all that!
Not exactly a "found object" but an "easy do," Cate Prado (Cloth, Paper, Scissors) talks about "upcycling" junk mail. Her emphasis is on making stencils out of school and office supplies. In the same article and of particular interest to ggd, a detailed description (from Julie Fei-Fan Balzer) of how to make stencils from magazines. Julie's emphasis is on fashion figures but ggd can see this as very useful for all kinds of other designs and shapes. Check it out here: http://tinyurl.com/Cate-s-Article
****************************
Thursday, August 8, 2013
Still "Putzing" with Found Printing......
But got diverted......by a recurring problem that you may have as well.
ggd LOVES to stockpile supplies! Subscribes to "cheaper by the dozen" and loves the security of LOTS of supplies "at the ready."
However (and we've experienced this before but just like to forget about it) having lots of supplies and having lots of supplies and having lots of USABLE supplies may (often) be different things. So, a word of caution....not all supplies stockpile with the same success. Some inks dry out, some separate. Glue sticks shrivel and get "tough" and rubbery. Cans not closed adequately yield solid, unusable contents. Rubber cement turns solid. (But save the "chunks" for rubber cement pick-ups.) The list of supplies whose shelf life is suspect is long and disappointing when you are attempting to use a stash item.
However (and we've experienced this before but just like to forget about it) having lots of supplies and having lots of supplies and having lots of USABLE supplies may (often) be different things. So, a word of caution....not all supplies stockpile with the same success. Some inks dry out, some separate. Glue sticks shrivel and get "tough" and rubbery. Cans not closed adequately yield solid, unusable contents. Rubber cement turns solid. (But save the "chunks" for rubber cement pick-ups.) The list of supplies whose shelf life is suspect is long and disappointing when you are attempting to use a stash item.
Years
ago, the granddaughters would regularly have a "test and toss"
session.....to get rid of felt tips that were too dry to be fun. (Tossing meant scoring a "basket"--a waste basket--hit from a few feet away!) The
same idea would be useful for other supplies as well.
And......checking labels as well as talking with vendors when purchasing supplies might avoid the problem all together.
>>You can probably tell from this, why more found object printing samples have not made it to these pages in the last couple of days. : )
****************************
Thursday, August 8, 2013
Not Only Were We Diverted.....
by checking the state of some really OLD supplies, we indulged in a Pinterest Browse that got out of hand!
Every "Found Object" craft idea you could ever think of was listed somewhere as someone's great new idea. We all really know "there is nothing new under the sun" but somehow it doesn't seem like it when if "feels" like you thought of it all by yourself whatever "it" is. : )
We found Fab's cardboard printing shapes and corks as designs AND handles listed and ggd's fork print texture.......
ggd even found a pattern we "thought" we had originated some forty years ago!!! Not only do we feel redundant, we feel VERY OLD!
In any case, if you have a smattering of self control--enough not to feel you have to read every set of directions "pinned"--we would recommend checking out Pinterest.
Eventually the browsing settles down to a more reasonable pace (different timing for different folks!) and you can begin to think of it as another useful tool in your crafter's arsenal. You can file away ideas for future use and be able to find them quite easily. It's a bit like Google in pictures! Good illustrations and for the most part, good information. Did see the "hint" for sharpening scissors by cutting foil listed there. I've tried it numerous times without success so not every "pin" is a winner!
Not all new. You
will find some of your own good old standbys. And you may be reminded
to bring back some of your own long forgotten "tricks" for current use.
For now.....out of Pinterest, off the computer and back to playing with "found objects."
****************************
Friday, August 9, 2013
Friday, August 9, 2013
Fun Foam of course.....is the ever present crafts supply....almost as common as crayolas and construction paper were "back in the day."
 It's good for cushioning under your material when stamping. Very handy to protect your more elaborate cards when mailing and can be easily cut to make simple elements. It holds the ink nicely so stamps very clearly. In a pinch it will make a useful stamp pad as well.
 In this case, the stamp silhouette was created with a punch and mounted on an ink bottle that was handy. (Another found item? Not for stamping but for use as a temporary stamp mount.)
****************************
Plastic Produce
Bags
for texture
Simple Masking
What DID we do before Post-it notes?


